It's the same problems as with getting anything done really:
1. Time: Not enough of it.
2. Energy: Not enough of it.
3. Life: Ignoring the needs of three children, impossible.
4. Internet: Too many interesting things that other people are doing and saying.
5. Not enough to show for the work: I have lots of demo and in-progress pics, but not enough after's - cause the reality is that lots of things are not finished yet. :(
I wish I had started diligently recording what went on day by day from the beginning. Because it is interesting to track the ups and downs rather than just present a before and after. Yesterday's post for instance would have recorded the new electrical pole and transformer that went up and now hovers over our neighbors garage. When I came home and saw it I was devastated for them since although they had agreed to it and may have some benefit for them, it mars the appearance of their home - hopefully just to me since it is new and once you look around you see electrical poles everywhere, but still, what was supposed to be an exciting day for us - we can finally get rid of the temporary for 8 months inch diameter cord that runs though our house - ruined by impacting a neighbors space (for the record it should allow them to remove a pole that is currently in an inconvenient place in their back yard and give them upgraded service). To top it off, it was expensive, at the discounted rate of $3000. And if I had been keeping a good record I would have had another depressing post back in October when we initially found out that they weren't going to let us rehook our line up to the existing grid and that we would have to incur some additional cost to appropriately tap back into the grid. Now I am bummed thinking about the whole thing. Best to go fold laundry. It's sad when folding laundry is a remedy.
To Rebuild a House
Adventures and misadventures in remodeling.
Thursday, February 27, 2014
Monday, February 24, 2014
Paint and Stain
We do a lot of this around here. We go through a lot of brushes, rags, rollers or whatever is the best vehicle for the job. It always starts out fun but it gets old. Luckily we have some decent help.
I said it was decent help.
Sometimes the help has to go to time out when they don't listen. And sometimes the help falls asleep while in time out.
I like the little tongue sticking out. He does this when he colors also.
Sometimes the help has to go to time out when they don't listen. And sometimes the help falls asleep while in time out.
Tuesday, February 11, 2014
Harris Wood Bond - Redux
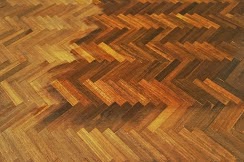
So...after all that work redoing the floors, I have to say I wasn't 100% thrilled. It looked pretty good - but there were a few obvious swirls from the sanding machine and the polyurethane that I used wasn't heavy duty enough and so once I tried to clean it with a swiffer, bits of lint got stuck everywhere. After a few weeks of just tolerating it I got a sanding sponge and went to work and sanding the whole floor by hand removing the initial coats of poly and with some elbow grease sanding out the egregious swirl marks that had sucked up stain and didn't look great. 4 coats of Pro Finish Semi-Gloss Poly for Floors by Parks* later and I am finally happy to admit that we did this project ourselves.
Wednesday, January 29, 2014
Harris Bond Wood - Herringbone (c. 1967)
So before the kids and I arrived in El Paso, Ben scraped up over 1000 sq ft of the stuff with a flat head shovel.
But wait...we kinda liked that herringbone pattern. So in homage to the original design of the house, we had the pieces relaid in the office (formerly maids quarters) by our flooring crew. We found about 30 sq ft of new old flooring in a box in the garage so that was easy since it was in sq ft sheets, but the other 70 sq ft consisted of hundreds of individual pieces that had to have the old glue whittled off before it was relaid piece by piece.
Clearly it needed to be refinished.
So we rented a sander from The Home Depot for a day and sanded and sanded and sanded (with increasing grit each time)
Then moved on to using a belt sander for edges and tough spots.
Then wood filled any missing chunks. Note - I have yet to find a wood filler that I feel is actually stainable as adevertised.
We made the mistake of not enclosing the room that we were sanding and we ended up with sawdust all over the house.
Stain going on - Minwax Early American
Multi-Purpose Room Demo
I don't know how to post things in the order they happened without driving myself crazy, so I've got to start somewhere - ugliest room first.
Tuesday, July 16, 2013
Subscribe to:
Comments (Atom)


.jpg)


